Nighthawk 280 Setup Part 1
Here’s how I setup my EMAX Nighthawk 280 Pro with the latest version of Cleanflight and tuned the PIDs).
Posts In This Series
- Setting Up Cleanflight on an EMAX Nighthawk 280 Pro
- Flashing the ESCs with BLHeli and configuring for best performance
- Adding VBAT battery monitoring and a buzzer
- Adding a blackbox data recorder, configuring it, making video overlays & accurately tuning your PIDs
- Adding a MicroMinim OSD (On Screen Display)
Cleanflight
The EMAX Nighthawk 280 usually comes with the Baseflight flight control firmware installed but it’s also compatable with the Cleanflight and Betaflight firmwares.
Why Choose Cleanflight?
If you don’t already know, these 3 flight control firmwares are related. Baseflight is a fork of MultiWii but written specifically for more powerful 32 bit microcontrollers.
Cleanflight is a fork of Baseflight, started with the intention of improving the code quality of Baseflight and supporting more target platforms. For whatever reason, the Baseflight developers are hostile to Cleanflight. The Baseflight user community has largely now migrated to Cleanflight or Betaflight.
Lastly there’s Betaflight which is a friendly fork of Cleanflight. It’s designed to allow rapid prototyping of new features and testing by advanced pilots. It can be counterproductive to jump into Betaflight as a newbie but rest assured that the best features will make it into Cleanflight once they’re stable enough to be flown by the rest of us!
Installing The Cleanflight Configurator
Using Google Chrome, install the free Cleanflight Configurator from the Chrome Web Store.
Installing the CP2012 USB to Serial Driver
You shouldn’t need to install anything, but if you do need drivers, they’re available at the SiLabs Download site
Plugging in your nighthawk should cause a new serial port to appear on your computer.
Flashing The Cleanflight Firmware
You don’t need the flight battery connected, but you do need the USB connected.
On the Firmware Flasher tab of the Cleanflight Configurator, select the newest stable NAZE firmware available, it’s currently 1.11.0. Click Load firmware online to download it. Click flash firmware.
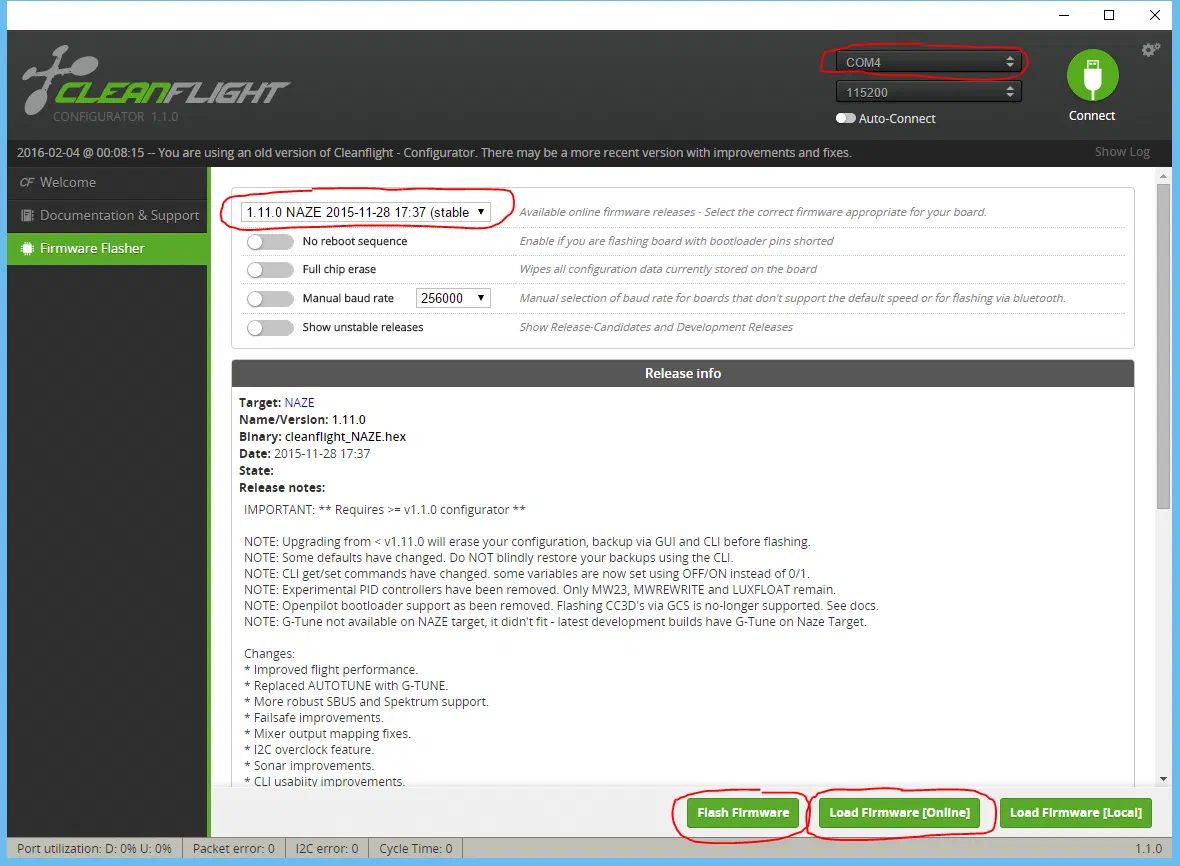
You should see “Programming Succesful” and from the onboard LEDs you’ll see that the controller will reboot.
Configuring Cleanflight
Setup Tab
Again, you don’t need the flight battery connected, but you do need the USB connected.
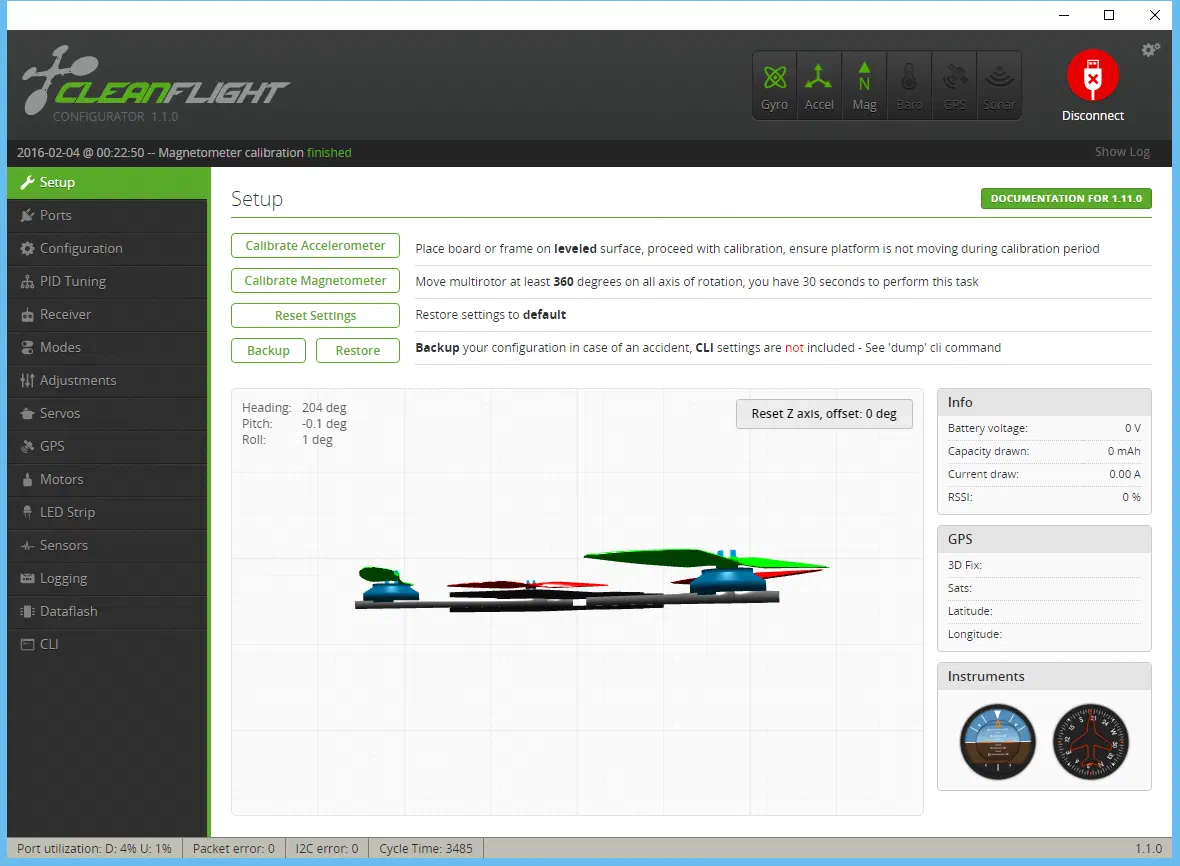
Using the configurator, connect to your newly flashed nighthawk. On the setup page, follow the instructions and calibrate both the accelerometer and magnetometer.
The gyro is automatically calibrated every time you power on the board. It’s important to have the nighthawk level when you connect the battery if you’re intending to fly.
Ports Tab
In a later post, i’ll show how i added Blackbox logging, which helps make PID tuning easier, and an OSD. For now though you can skip the Ports tab.
Configuration Tab
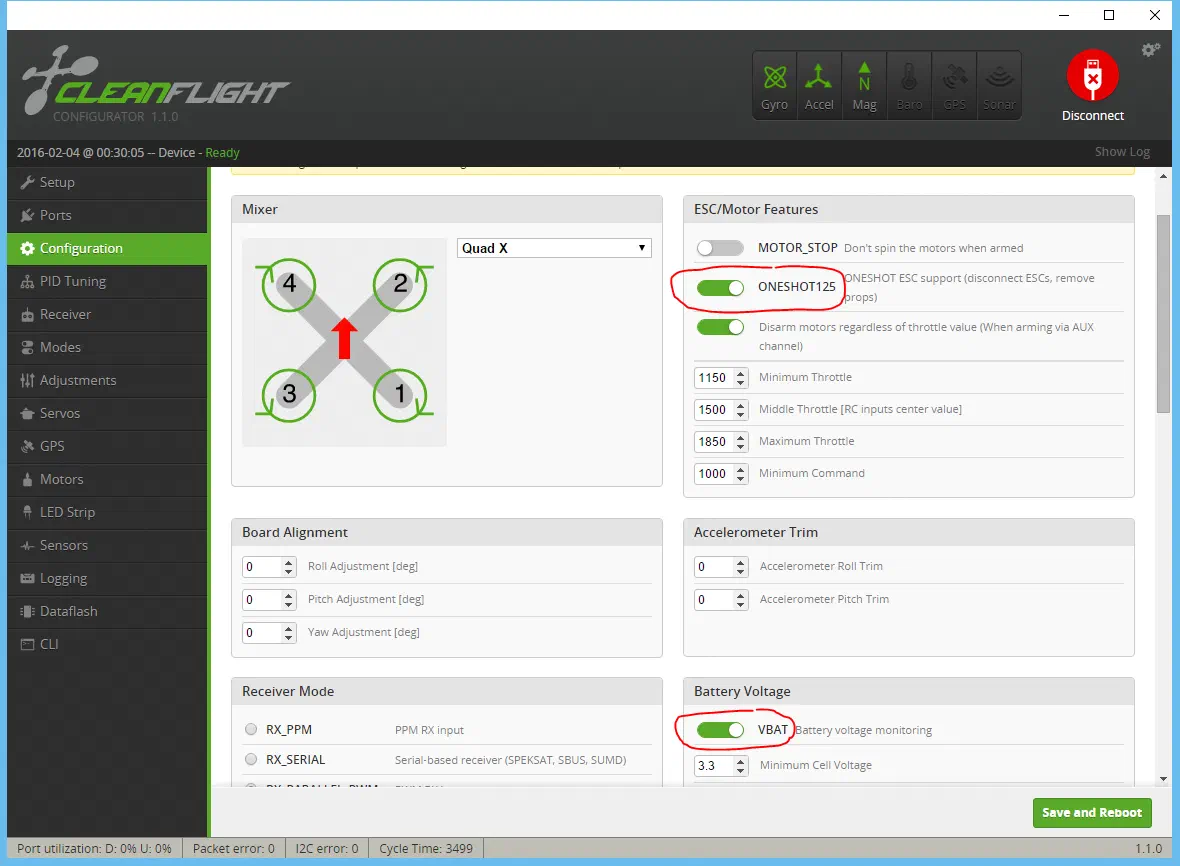
On the Configuration tab, enable OneShot125 and VBAT. Make sure RX_PARALLEL_PWM is selected for Receiver Mode. Save and reboot.
PID Tuning Tab
You’ll tweak the PIDs for your exact Nighthawk with your weight of battery and CoG but for now, these PIDs by 2DogRC on RCGroups are a fantastic starting point:
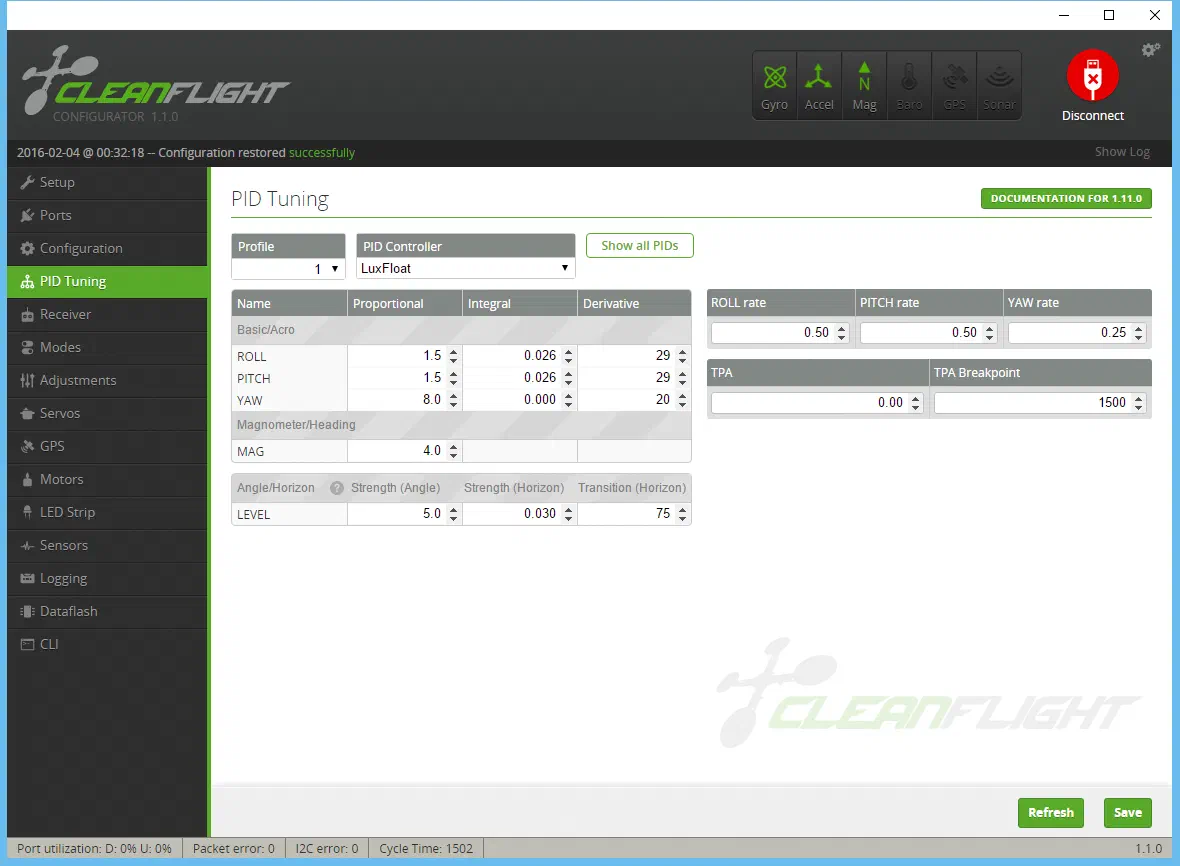
The LuxFloat PID controller takes advantage of the 32bit hardware where the multiwii and multiwii rewrite controllers do not. Plenty of pilots still fly these very succesfully. Like i say, you’ll tweak all this to suit yourself eventually.
Receiver Tab
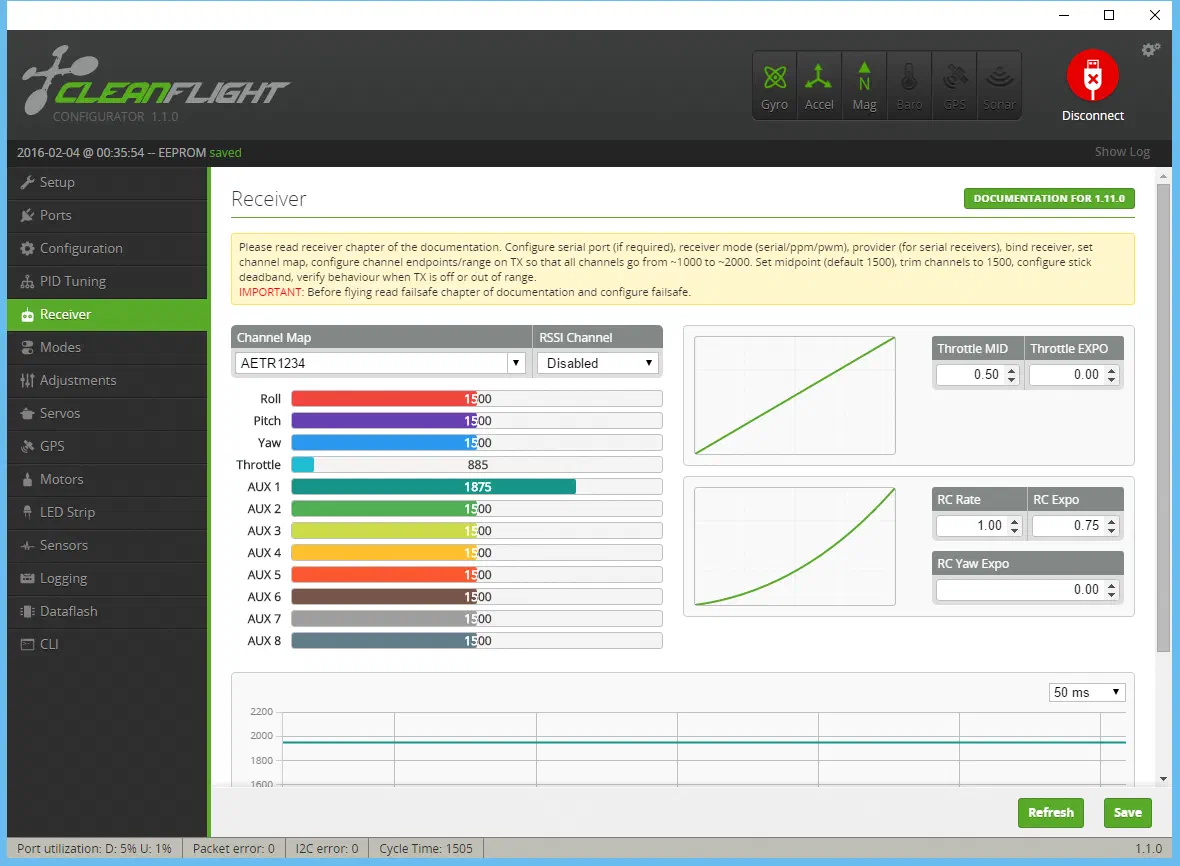
On the Receiver tab, set your RC rate to 1. This effectively disables this feature since it’s no longer required. Instead, you’ll tune the roll / pitch / yaw rates on the PID tuning tab.
Set your RC Expo, this is something you’ll tweak more yourself. Do not configure dual rates or expo on your transmitter since that will waste input resolution to the flight controller. As far as possible, you should treat your transmitter as a dumb box of control sticks and switches. All the intelligence should be on the flight controller. As well as maximising input resolution, it’s much easier to backup and restore settings.
Modes Tab
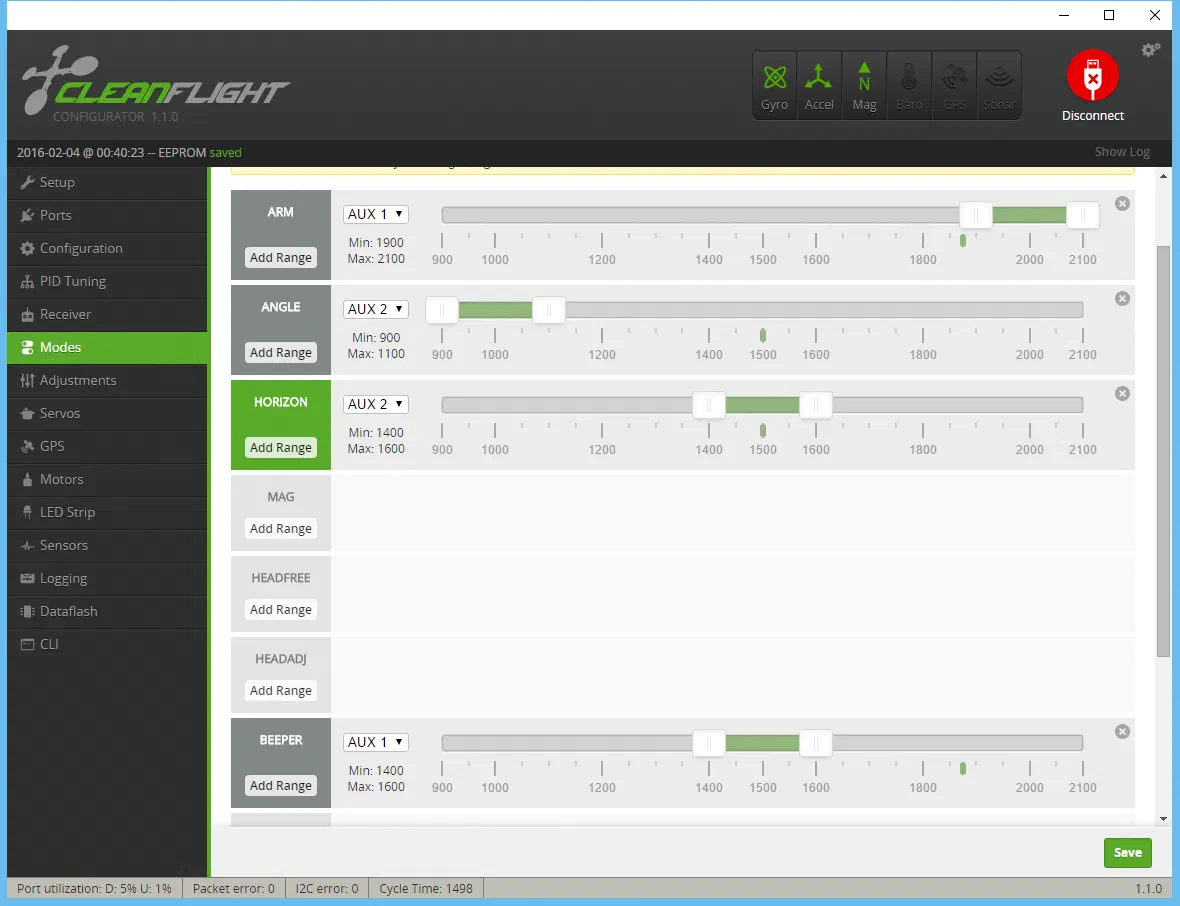
These mode configurations are a good starting point if you have the RTF kit with the EM-16 transmitter.
| Position | Left 3 Way Switch | Right 3 Way Switch |
|---|---|---|
| Top | Disarmed | Angle |
| Middle | Buzzer | Horizon |
| Bottom | Armed | Acro |
CLI Tab
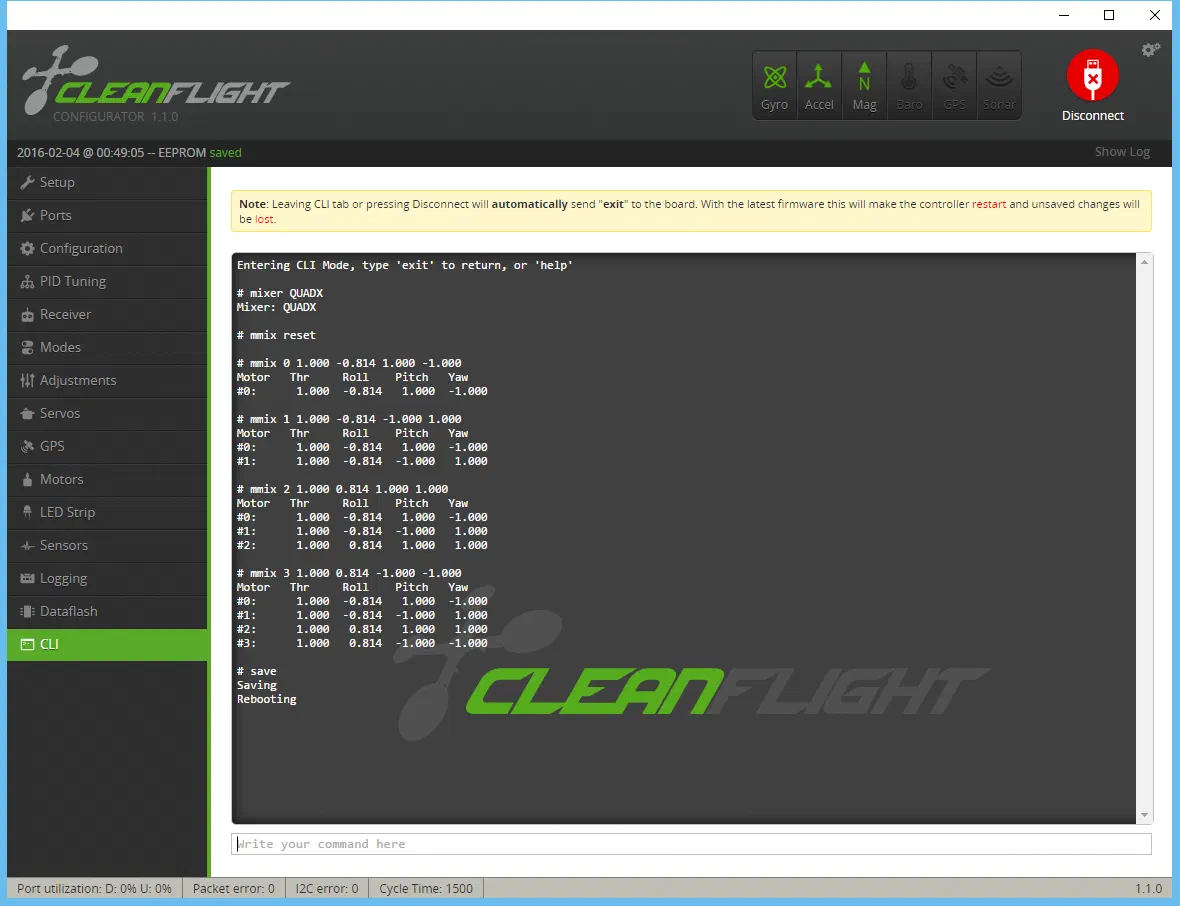
The Nighthawk 280 isn’t a perfect X quad. The distance between the front and rear motors is shorter than the distance between the motors at each side. If we don’t tell Cleanflight the relative influence of each of the motors then the response to our pitch and roll inputs will be different. Paste in these settings:
mixer QUADX
mmix reset
mmix 0 1.000 -0.814 1.000 -1.000
mmix 1 1.000 -0.814 -1.000 1.000
mmix 2 1.000 0.814 1.000 1.000
mmix 3 1.000 0.814 -1.000 -1.000
Then save these changes:
save
Motors Tab
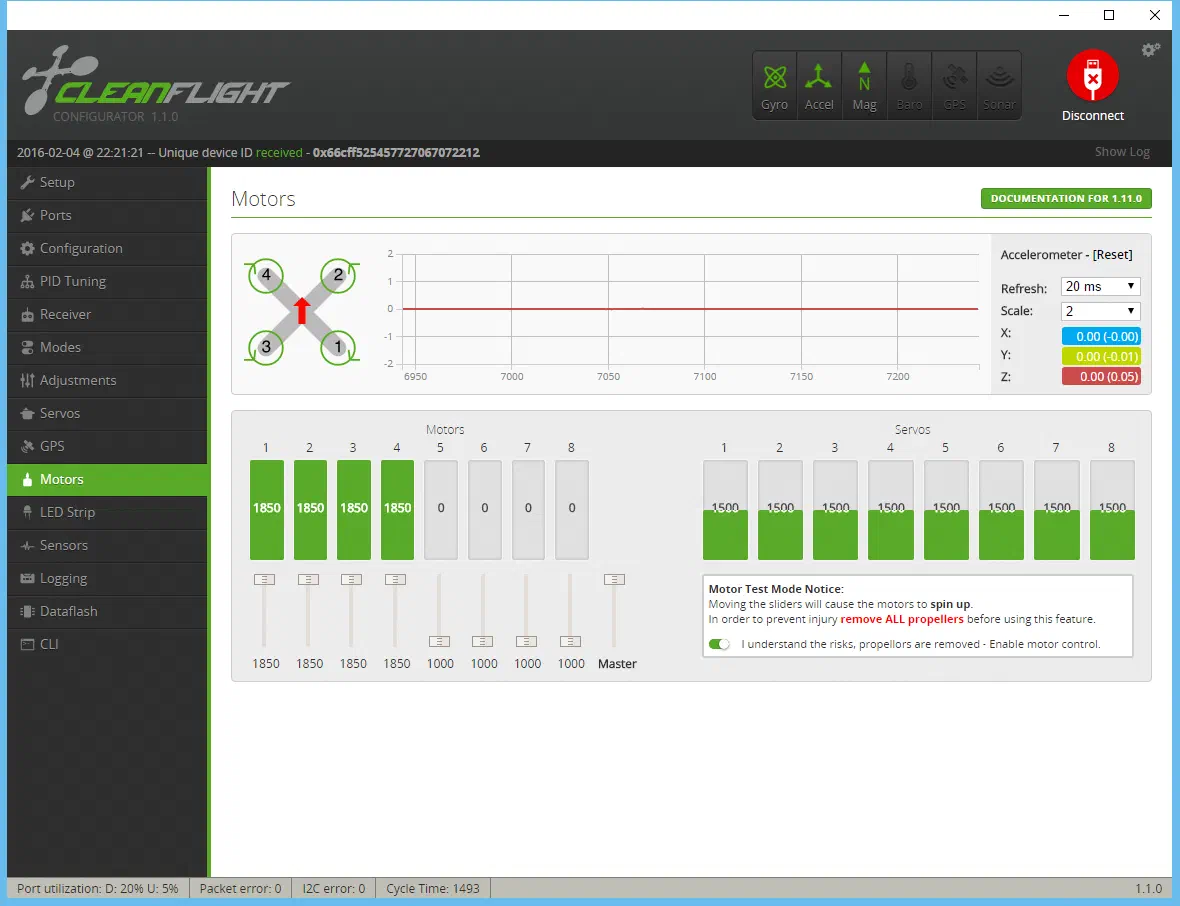
Remove your props. Check the “I understand the risks…” box and with the flight battery unplugged, slide the master slider to maximum (1850). Plug in the flight battery and as soon as the ESCs have beeped twice, drop the master slider to the bottom. Unplug the flight battery.
You’ve now calibrated your ESCs and are ready to
crash fly!
Note, there’s a potential gotcha with the ESCs on the Nighthawk and it got me first time around. If you set the throttle high and bring it low too late, you’ll be dropped into a menu (the ESCs beep to signal menu position). One of the options (helpfully not documented!) sets the ESCs to 3D mode. This means half throttle is 0rpm. Low throttle is full speed reverse and high throttle is full speed forward. Once in this mode there is no way to reconfigure using the stick commands.
You have 3 options:
- Enable 3D mode for all the ESCs and configure 3D mode in cleanflight
- Buy the new version of the EMAX ESC Programming card which supports changing the 3D mode setting
- Flash BLHeli onto the ESCs and re-configure with BLHeliSuite
The last option is what i’ll write up next!